how to install drip irrigation
This guide will show you how to design, install, and setup a DIY drip irrigation system with a programmable timer to automate your watering schedule. Gardening has never been this easy.
AUTOMATIC DRIP WATERING IN RAISED GARDEN BEDS
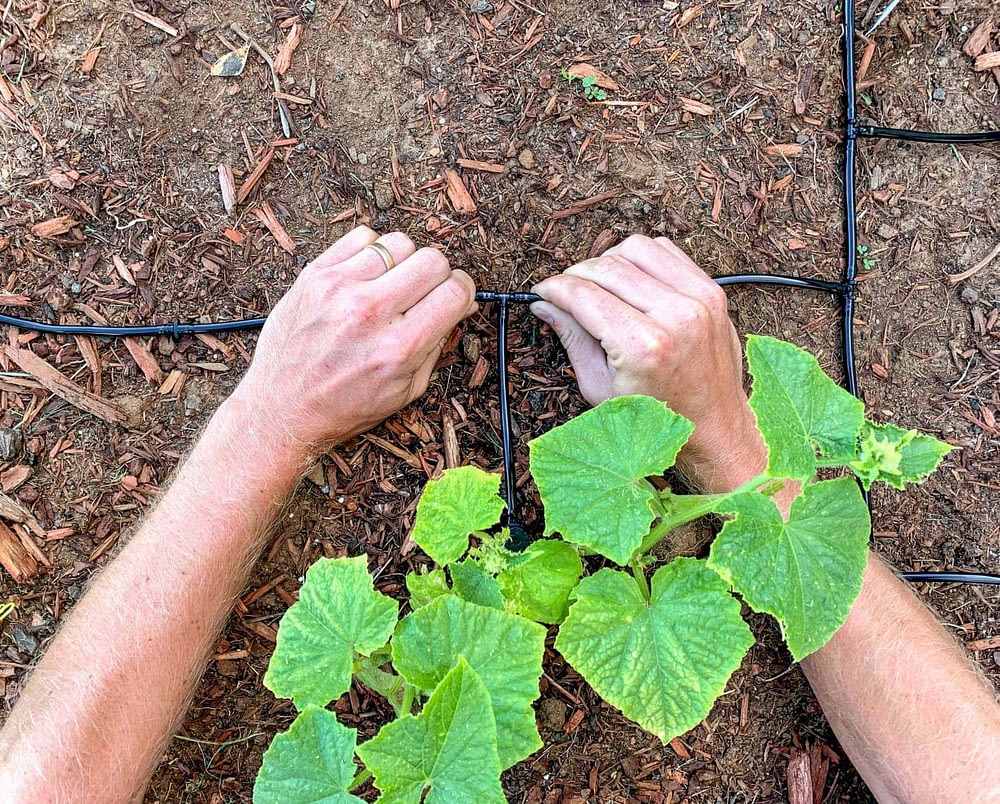
2021 is going to be a great year for gardening – with more people staying at home, and prioritizing heathy lifestyle habits, there's never been a better time to start your garden!
Gardening doesn't have to be complicated, or difficult. Plants only need a few things – and when those needs are satisfied – a garden will thrive and grow plenty of fresh healthy vegetables or flowers.
Plants need three things: food, water, and sun. In a perfect world, nature takes care of providing proper quantities of these three necessary elements. Unfortunately, it isn't always that easy in the real world! Most of the time a garden will need supplemental water and food (fertilizer).
Benefits of Drip Irrigation
Drip irrigation is an excellent choice for any garden because it's easy to set up, and inexpensive. Drip irrigation uses less water than other watering systems because it is extremely efficient. Drip irrigation systems supply water directly to a plant and its roots in the soil immediately below.
Water is delivered exactly where it's needed, and not wasted in the unused soil between plants (as is the case with sprinkling systems). A drip irrigation system supplies water slowly so the soil is able to absorb essentially all of the water; as a result, very little water is lost to evaporation.
As an added benefit, weeds will be less likely to sprout up between plants because the unused soil is not being watered.
Benefits of Automatic Watering
Watering a garden by hand can be a pain and takes up precious time. It's easy to water too little, too much, or forget entirely. Furthermore, watering by hand requires your presence, which can get in the way of those summer vacation plans!
This is where an automatic watering system comes in handy. An automatic drip irrigation system will keep watering your garden, even when you aren't around.
The biggest benefit of using a programmable timer to automate your watering schedule is the time savings; automatic watering will save you time every day!
A drip irrigation system controlled by an automatic timer is the perfect combination, and provides all the benefits of both.
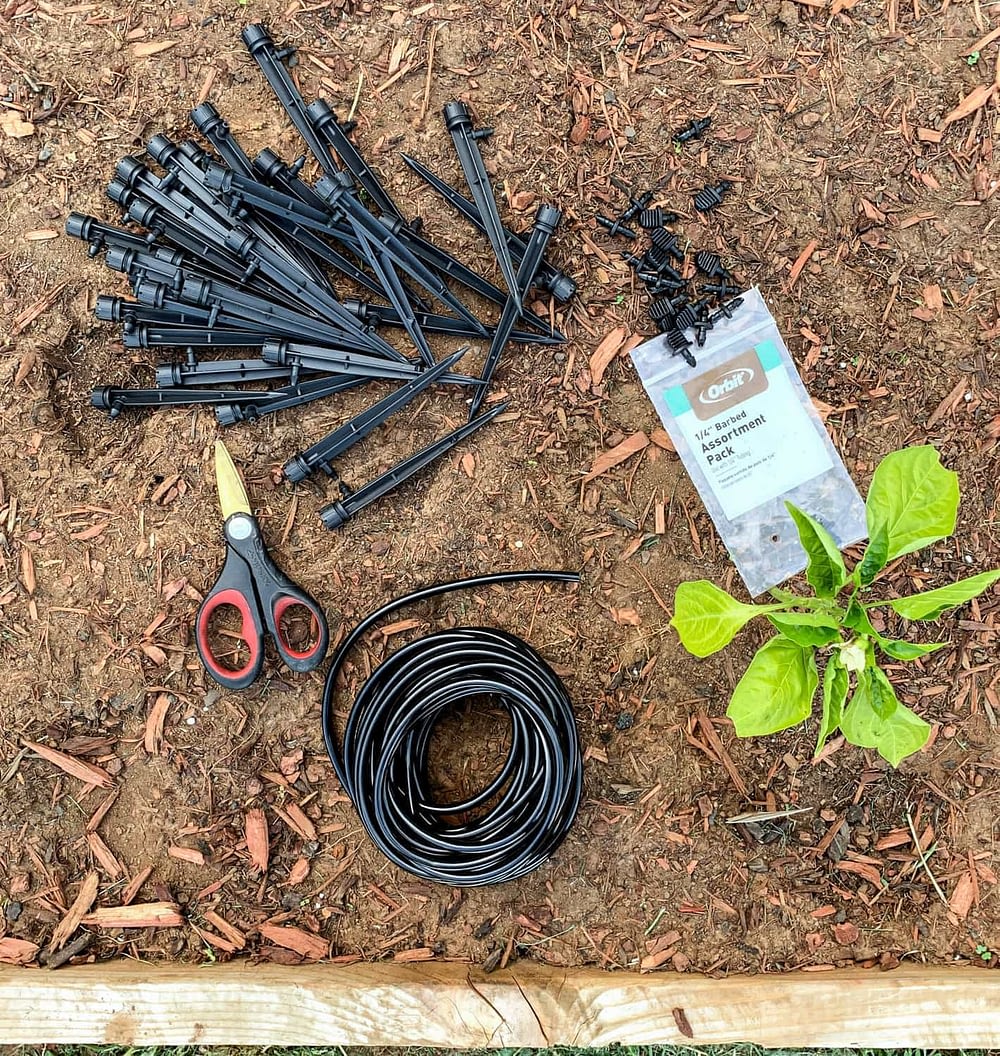
How To Get Started
Automatic drip watering is an easy DIY project, and it's budget friendly! The project is affordable and can be completed in under an hour.
Before you can get to work on designing and installing a drip irrigation system, you'll first need to have a garden bed.
If you don't have a raised garden bed yet, or need to build a new one, check out my complete guide on How To Build A DIY Raised Garden Bed. It has all the info you'll need, plus a step by step video tutorial to help.
Or, if you'd rather just buy one, check out my top picks for Best Raised Garden Beds. These pre-made, ready-to-assemble kits are easy and affordable. Styles range from galvanized steel, to wood, to rattan, and so many more!
Automatic Drip Irrigation Supplies
All of the following supply links are on Amazon.
- Programmable Automatic Watering Timer
- 1/4″ Drip Tubing (50FT)
- Hose Adapter
- Assorted 1/4″ Barbed Fittings
- Drip Emitters (50)
- Tubing Holder Stakes
Additional Supplies For Larger Systems
- 1/2″ Drip Tubing (50FT)
- 1/2″ To 1/4″ Reducer Tees
- 5/8″ Supply Hose
- Supply Hose to 1/2″ Adapter
Step 1) Planning & Designing A Drip Watering System
Drip irrigation systems use low-flow drip emitters to deliver water to the plants in a garden. You can think of drip emitters as mini sprinklers.
Drip emitters have a very small coverage area and must be placed within a few inches a plant. One emitter is needed for each plant.
The number emitters to build a complete drip watering system in a raised garden bed will vary depending the size of the plants. For example: a large zucchini plant will sprawl out, and can take up nearly half of a raised garden bed. However, small plants can often be be fit into a 12" squares. A garden with only small plants could require as many as 32 drip emitters in a 4FT by 8FT raised garden bed.
I recommend using a notepad and pencil to sketch out a plan for the unique design of your garden.
Try to make your design look like a tree, with one main distribution line that runs the length of the garden (representing the tree trunk) and 'branches' that come off the trunk. Each branch should lead to a drip emitter. See the image below for an example.
Make sure to keep all the drip tub tubing lines straight and parallel with the sides of the raised garden bed – to keep everything looking neat and tidy.
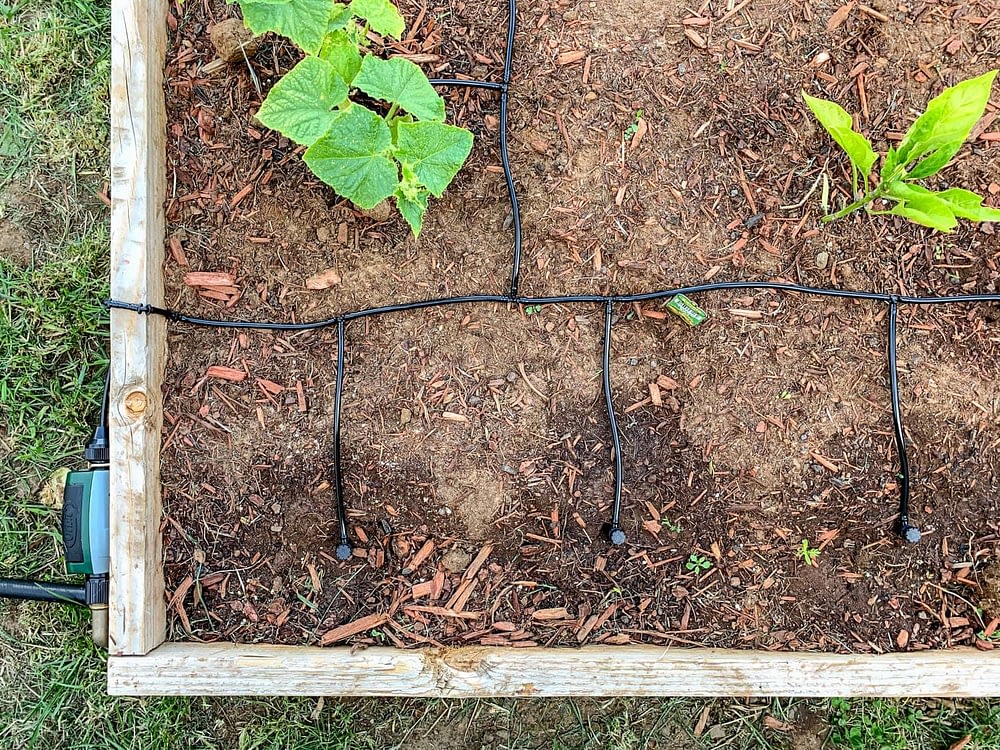
Trying to feeding more than 10 drip emitters with a single 1/4″ tubing line will not work. It results in uneven watering; there will not be enough water pressure for the drip emitters at the end of the system. A 1/2″ main distribution line should be used for drip watering systems with more than 10 emitters. This larger diameter tubing is capable of supplying much more water and will keep water pressure up throughout the system.
Drip Tubing Size & Flow Rates
The recommended maximum flow rate for 1/4″ drip tubing is 30 GPH (gallons per hour) with a maximum of 30 FT of tubing. The drip emitters used in this tutorial have an adjustable flow rate. They can be set between zero and 10 GPM by tightening or loosing the screw-on emitter cap. At the max flow setting of 10 GPM, three drip emitters would be the most a 1/4″ drip hose could handle. Adjusting the flow rate down to 3 GPM (or less) allows you to supply up to 10 drip emitters with a single 1/4″ tube.
Larger 1/2″ drip tubing is rated for a maximum of 200 GPM and 200FT. This size gives you plenty of headroom to use as many drip emitters as necessary. Reducing tees make it easy to connect a 1/2″ main distribution line to 1/4″ tubing for each of the smaller 'branches' in the system.
To install drip irrigation systems in multiple garden beds, use a 5/8″ supply hose to bring water to each individual raised garden bed. Use a 1/4″ Drip Hose Adapter (or a 1/2″ Hose Adapter for use with a 1/2″ main distribution line) to convert from supply hose to drip tubing.
Step 2) Install Drip Lines & Emitters
Installing the system is the most satisfying part of this project! Once you have a plan and all the supplies, the actual installation is process is easy and quick.
How To Cut 1/4″ Drip Hose
Start by measuring, and cutting a 1/4″ drip hose leading to the first drip emitter on your design plan. To cut the hose, use a good pair garden shears. A utility knife will work, but I prefer using garden shears because they make it easy to cut the tubing safely. They're also great for pruning when the time comes!
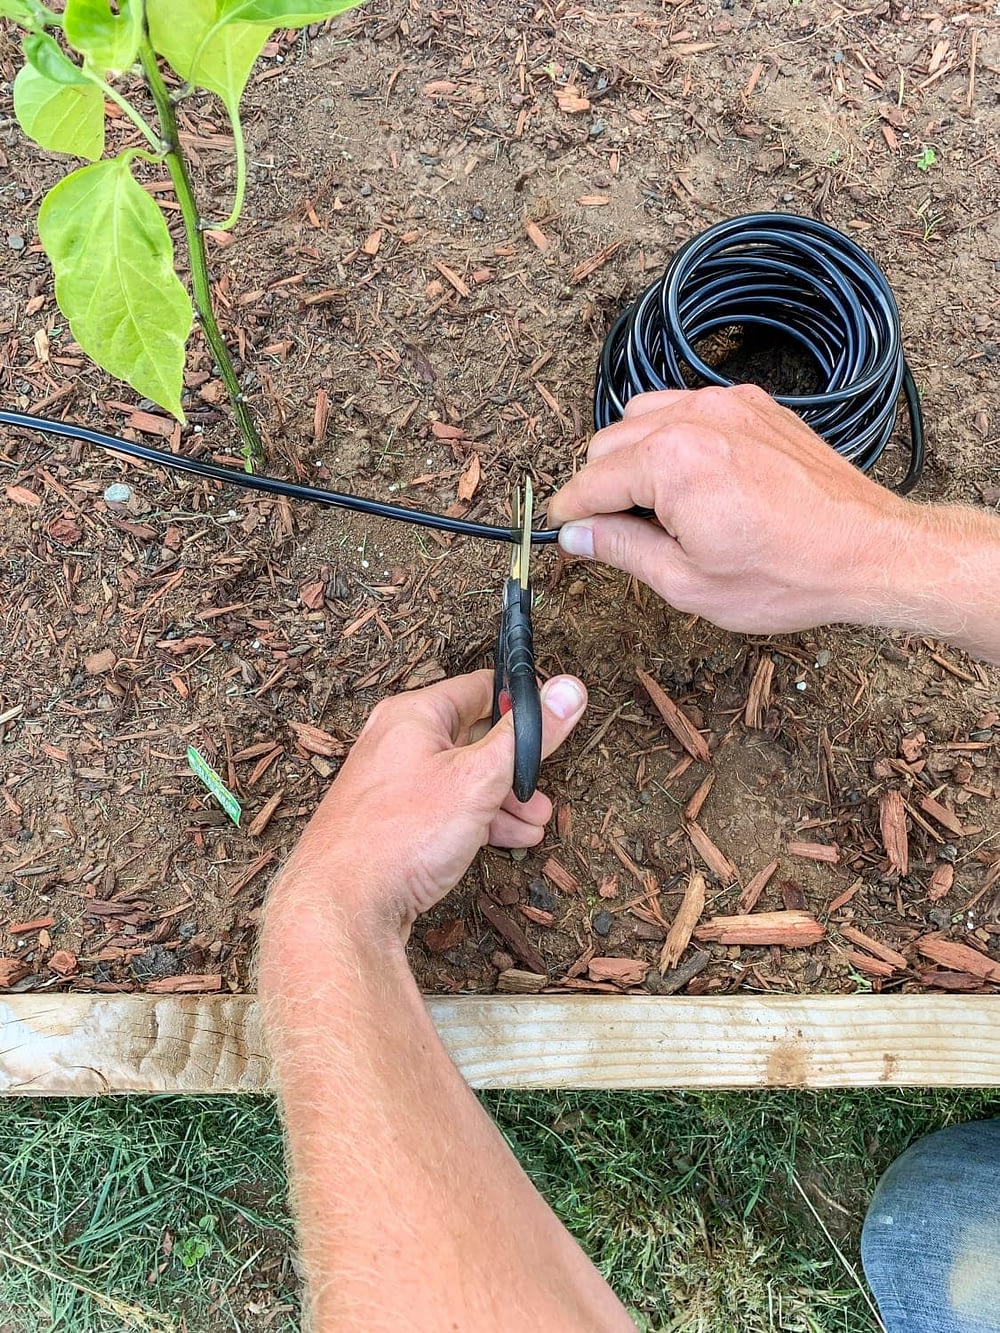
How To Install 1/4″ Barbed Drip Fittings
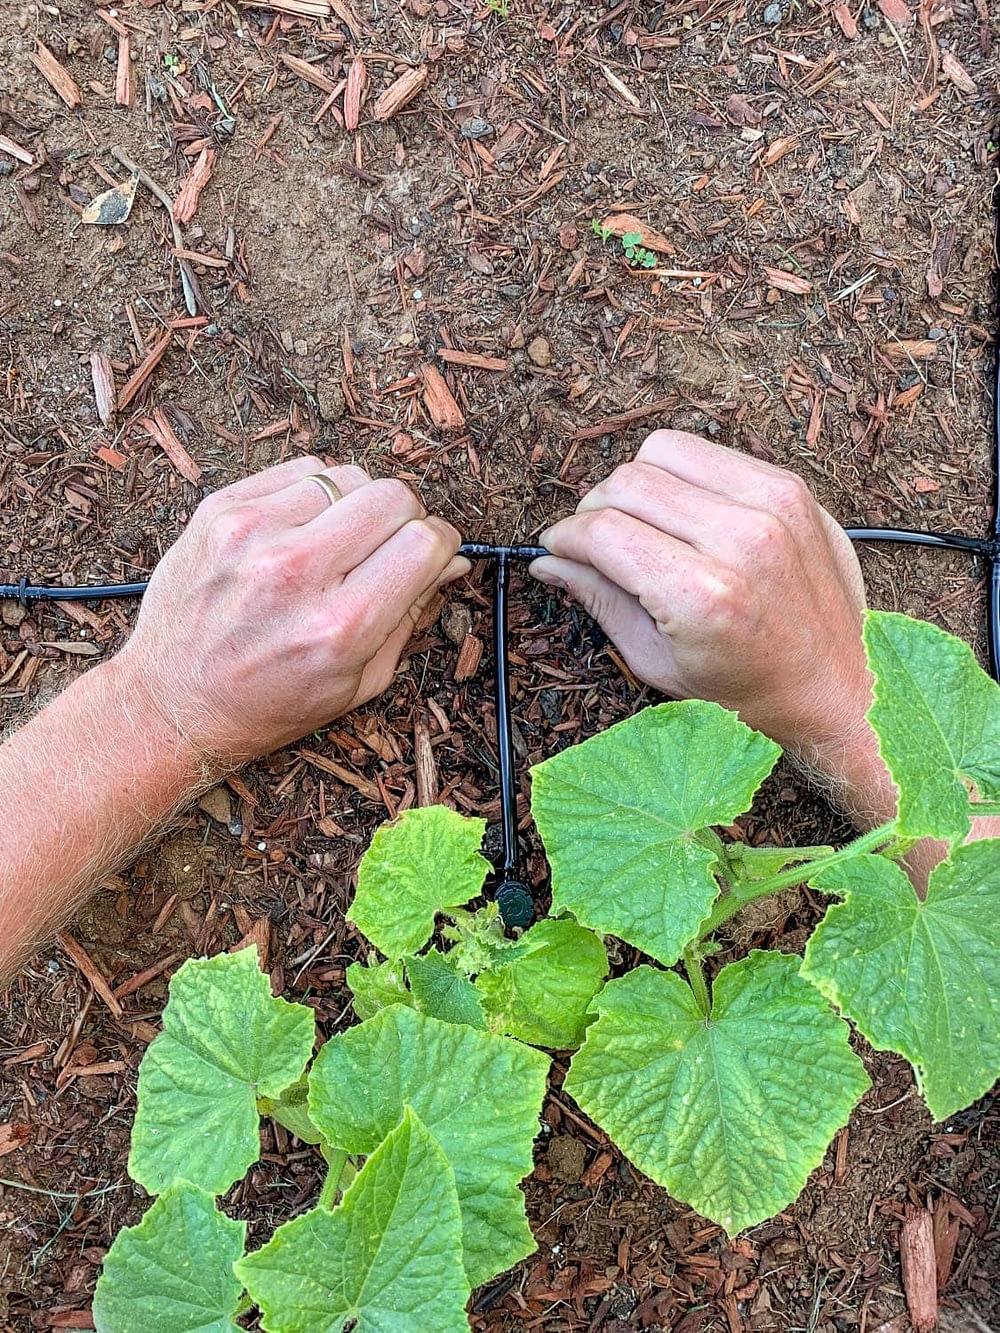
To connect drip irrigation tubing to a barbed fitting, press them firmly together by hand. Make sure to keep pressing them together until the tubing slides past the barbs on the fitting. Joining tubing and a barbed fitting instantly creates a watertight seal. The connection stays sealed in place without any glue, fasteners or hose clamps.
This does require a little bit of hand strength and force. If you're having trouble getting the hose pressed all the way onto the fittings, try letting the tubing sit out in the sun for a few hours, or soaking the tubing in hot water. Installation requires less force when the tubing is hot because it's more flexible and elastic.
If you mess up, it's possible to remove a fitting. Simply pull and twist. With a little tug, the barbed fitting should separate from the tubing without a ton of force. As long as nothing breaks, you can reuse both the tubing, and the fittings.
Step 3) Setup An Auto-Watering Timer
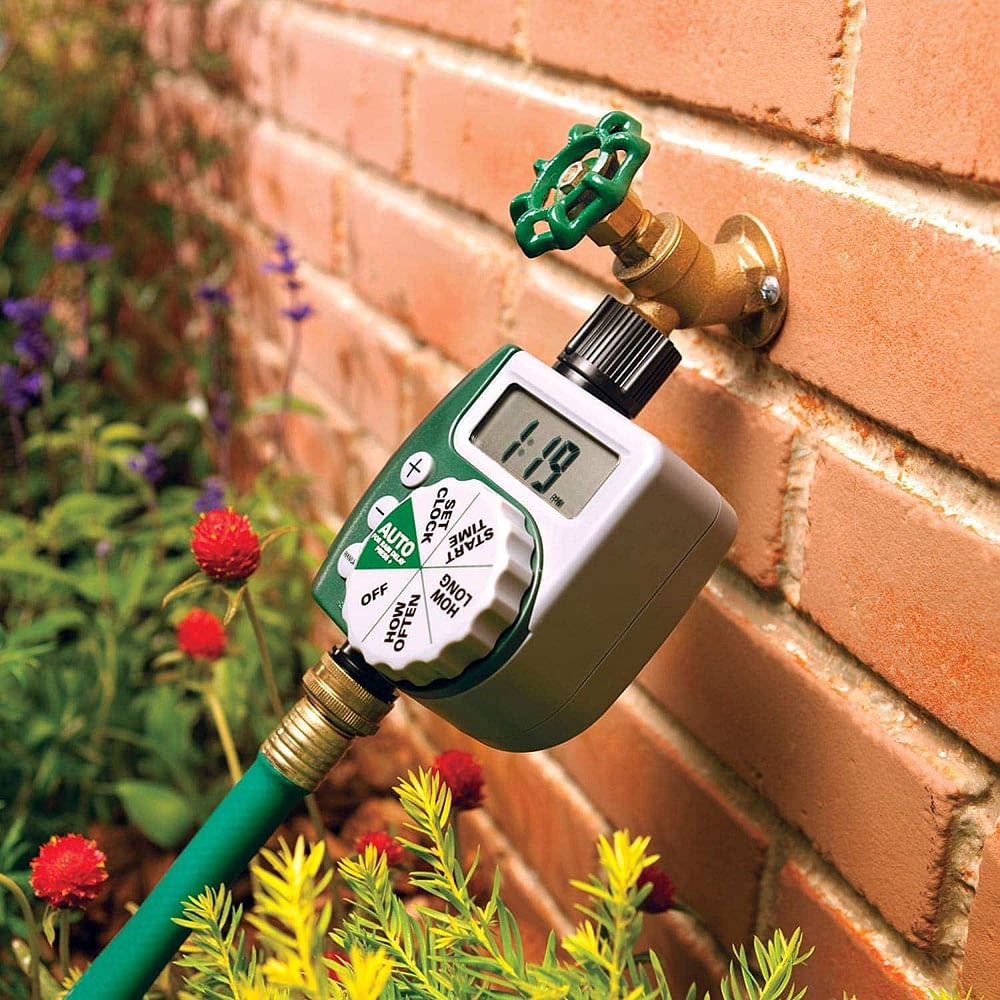
A programmable timer is what makes an automatic drip irrigation system extremely convenient. An auto-watering timer can be programmed to water your garden on a schedule that works best for the plants you're growing.
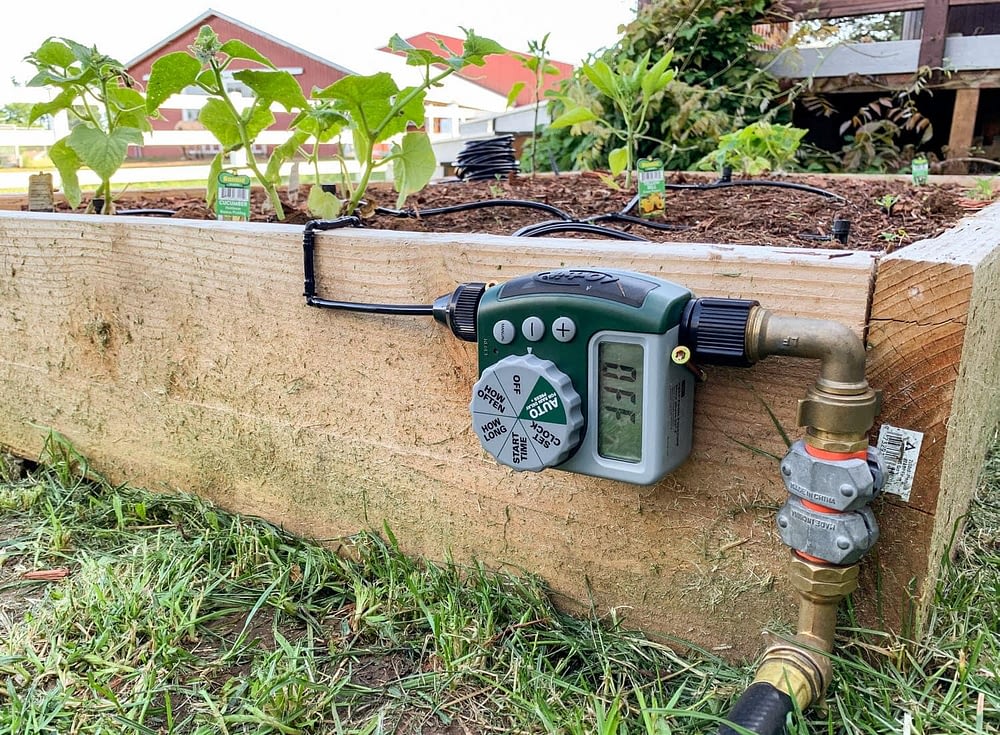
Install the timer directly onto a faucet, or mount it right to your raised garden bed. After installing two AA batteries, start setting up your programmable automatic watering timer. This timer is extremely user friendly. With a little luck, and a little skill, you will probably fly through the setup without even needing to consult the included instructions.
How Often Should You Water?
Unfortunately, there isn't a good one-size-fits-allanswer. How much water a garden needs depends on the types of plants, and the climate. For growing vegetables in a raised garden bed in Oregon's temperate Willamette Valley, I like to water every morning for 10 minutes. This doesn't provide the full amount of water needed, but it rains infrequently throughout the summer. When it's especially hot or dry, I'll up the watering duration to 15 min per day.
You can fine-tune the amount of water delivered to each plant by adjusting the drip emitters. For example: hot peppers are native to dry climates, so they don't require as much water as other vegetables. Turn the adjustable flow rate down on the drip emitters supplying water to hot peppers such as jalapeños or habaneros.
Keep in mind that a properly functioning drip irrigation system will only leave a small visible wet area on the surface soil around a drip emitter. This might be a bit of an adjustment if you're used to hand watering and seeing everything sopping wet. But don't worry, most of the water is below the surface!
Don't Forget The Plant Food!
Your drip irrigation system will provide all the water needed, however, your plants still need food. There is a number of different ways that work, but I recommend using this Miracle-Gro Garden Feeder All Purpose Plant Food from Amazon. It makes the job super easy! For best results, feed every 1-2 weeks.

Check Out Our YouTube Channel!
If you enjoyed this tutorial and want to see more projects like this one, check out all of our DIY projects.
Thanks for reading!
UP NEXT: How To Build A Raised Garden Bed
Thanks for reading along! Let me know if you have any questions in the comments below.

How To Install An Automatic Drip Irrigation System
how to install drip irrigation
Source: https://joyfullygrowingblog.com/automatic-drip-irrigation/
Posted by: carrollboremat.blogspot.com

0 Response to "how to install drip irrigation"
Post a Comment